Address
304 North Cardinal
St. Dorchester Center, MA 02124
Work Hours
Monday to Friday: 7AM - 7PM
Weekend: 10AM - 5PM
Address
304 North Cardinal
St. Dorchester Center, MA 02124
Work Hours
Monday to Friday: 7AM - 7PM
Weekend: 10AM - 5PM
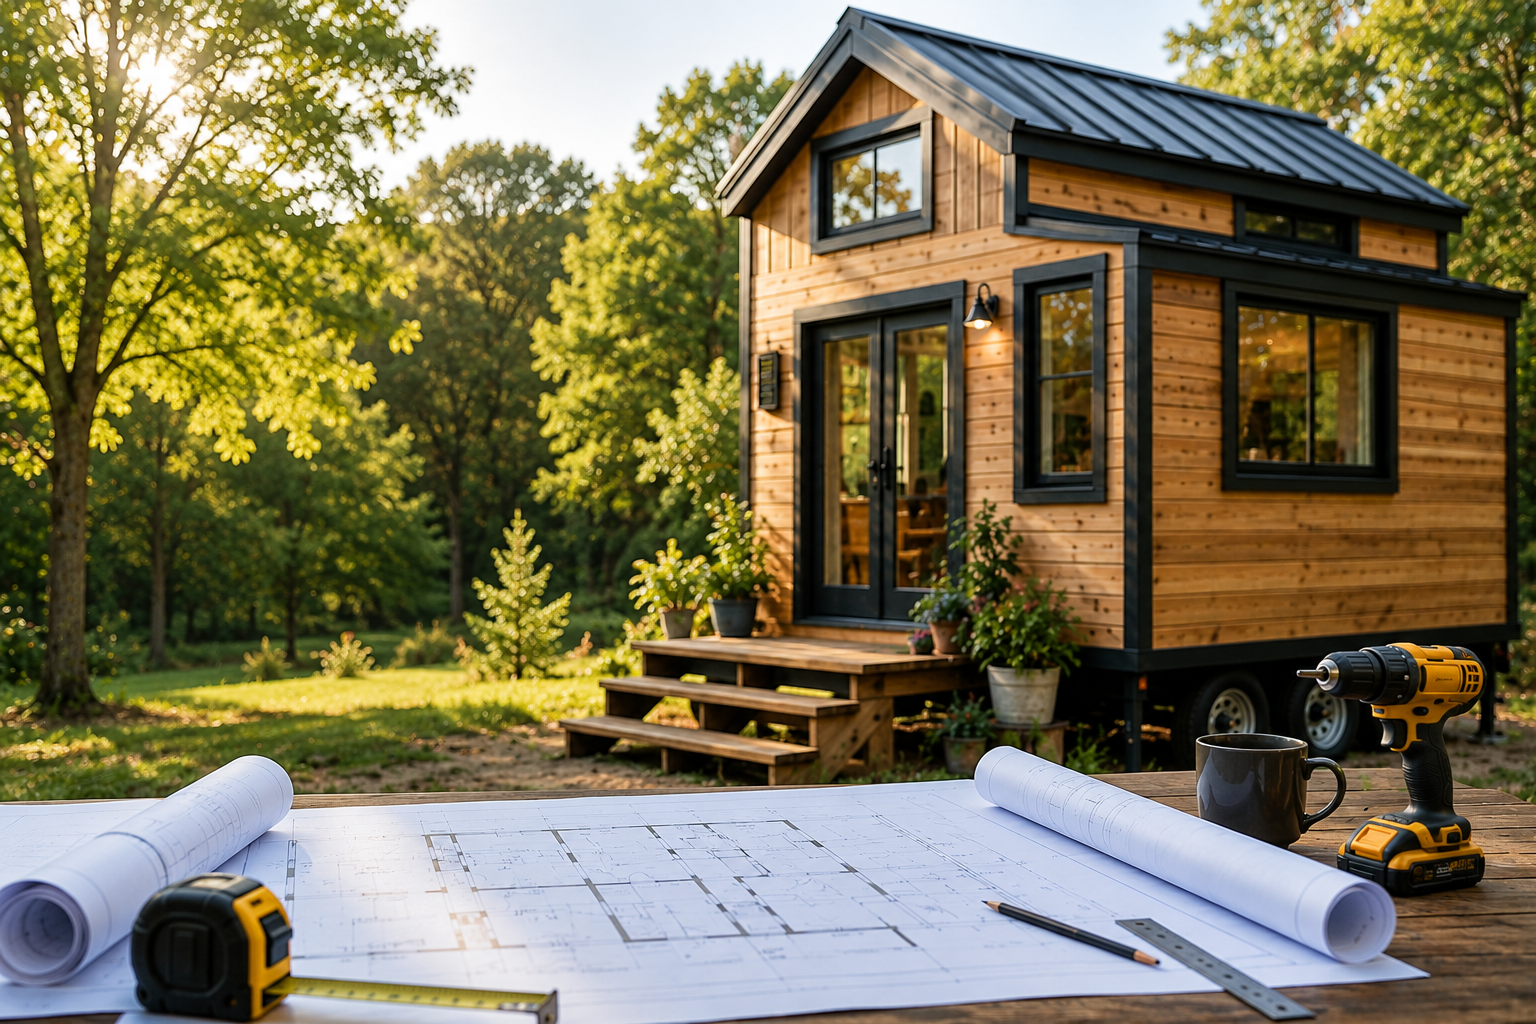
Imagine waking up without a mortgage payment. No rent due on the first. No utility bills that eat up a third of your paycheck. For thousands of Americans, that reality started with a set of DIY tiny house plans and a weekend trip to the lumber yard.
The tiny house movement is no longer a fringe idea. With median home prices exceeding $400,000 in most U.S. markets and rental costs at historic highs, more people are turning to compact living as a genuine financial strategy. But building a tiny home successfully requires more than enthusiasm. It requires the right plan, the right materials, a realistic budget, and a clear understanding of local regulations.
This guide covers everything you need to know to go from blank page to move-in day, whether you’re building a 120 sq ft mobile home on a trailer or a 400 sq ft permanent cabin retreat.
Between 2019 and 2024, internet searches for “tiny house plans” grew by over 300%. That’s not just curiosity. It reflects a genuine shift in how people think about homeownership, financial freedom, and environmental responsibility.
The core benefits driving this movement:
The plan you choose determines everything downstream: your budget, your build timeline, your legal options, and how comfortable life in the home will actually be. Before browsing plan websites, get clear on these four factors:
THOWs are built on steel trailer beds, most commonly in 16 ft, 20 ft, 24 ft, and 28 ft lengths. The trailer you choose sets your maximum width (usually 8.5 ft) and the total structural load capacity. A 24 ft trailer typically supports 14,000–18,000 lbs, which is adequate for most fully finished tiny homes.
Best for: People who value mobility, want zoning flexibility, or aren’t ready to commit to a permanent land purchase.
Watch out for: Weight distribution matters enormously. An improperly loaded THOW can be dangerous to tow. Always calculate your finished weight before purchasing a trailer.
Foundation-built tiny homes sit on concrete slabs, piers, or crawl spaces, just like traditional homes. They allow wider floor plans (up to 20+ ft) and are generally easier to permit, insure, and finance. Many states are now adopting IRC Appendix Q, which creates a specific building code pathway for homes under 400 sq ft.
Off-grid builds are designed to operate independently from municipal utilities. They incorporate solar panel arrays (typically 400W–2,000W), battery storage systems, propane or wood heating, rainwater collection with filtration, and composting or incinerating toilets. Off-grid plans require more upfront investment but deliver the lowest ongoing living costs.
Before selecting a layout, answer these questions honestly:
A solo remote worker needs a different floor plan than a couple with two dogs. A plan that looks great online can feel claustrophobic after six months if it doesn’t fit your daily habits.
Great tiny house design isn’t about fitting less into a small space. It’s about making every square foot serve multiple purposes. Here’s what separates a livable tiny home from one that feels like a storage unit:
Most tiny homes have 9–13 ft ceiling heights, which creates valuable vertical real estate. Smart plans use this with:
A well-designed tiny kitchen can be fully functional without feeling cramped. Key elements include:
Cost ranges vary significantly based on home size. Below are realistic estimates broken into two build categories: under 150 sq ft (micro builds, most THOWs) and 150–400 sq ft (larger THOWs and small foundation homes).
| Expense Category |
Under 150 sq ft |
150–400 sq ft |
|
Trailer or Foundation |
$4,500 – $8,000 |
$6,000 – $15,000 |
|
Framing Materials |
$3,000 – $6,000 |
$5,000 – $10,000 |
|
Roofing |
$1,500 – $3,500 |
$3,000 – $7,000 |
|
Plumbing & Electrical |
$2,500 – $5,000 |
$4,000 – $9,000 |
|
Insulation |
$500 – $1,500 |
$1,200 – $3,500 |
|
Windows & Doors |
$1,500 – $4,000 |
$3,000 – $7,000 |
|
Interior Finishing |
$3,000 – $7,000 |
$5,000 – $12,000 |
|
Appliances & Fixtures |
$2,000 – $5,000 |
$3,500 – $8,000 |
|
TOTAL (Estimated) |
$18,500 – $40,000 |
$30,700 – $71,500 |
Note: These figures assume you’re doing the majority of the labor yourself. Hiring out plumbing and electrical (often required by code) adds $3,000–$8,000 to most builds.
For THOWs, material selection is a structural and safety issue, not just an aesthetic one. Every pound counts when your home travels at highway speeds. For foundation builds, durability and insulation value take priority.
Tiny house builds almost always encounter unexpected costs. Add a 20% contingency buffer on top of your material estimates before you start purchasing anything. Decide which elements you’ll DIY (framing, painting, flooring installation) and which you’ll hire out (electrical rough-in, plumbing connections, propane systems). In many jurisdictions, licensed tradespeople are legally required for utility work regardless of whether it’s a DIY build.
Look for plans that include detailed material lists, engineering drawings, and dimensions for each wall section. Quality plans from reputable designers cost $200–$800 and save thousands in costly mistakes. If building a THOW, ensure the plan specifies a matching trailer model and includes weight distribution calculations. For foundation builds, check whether the plan meets IRC Appendix Q if that code applies in your area.
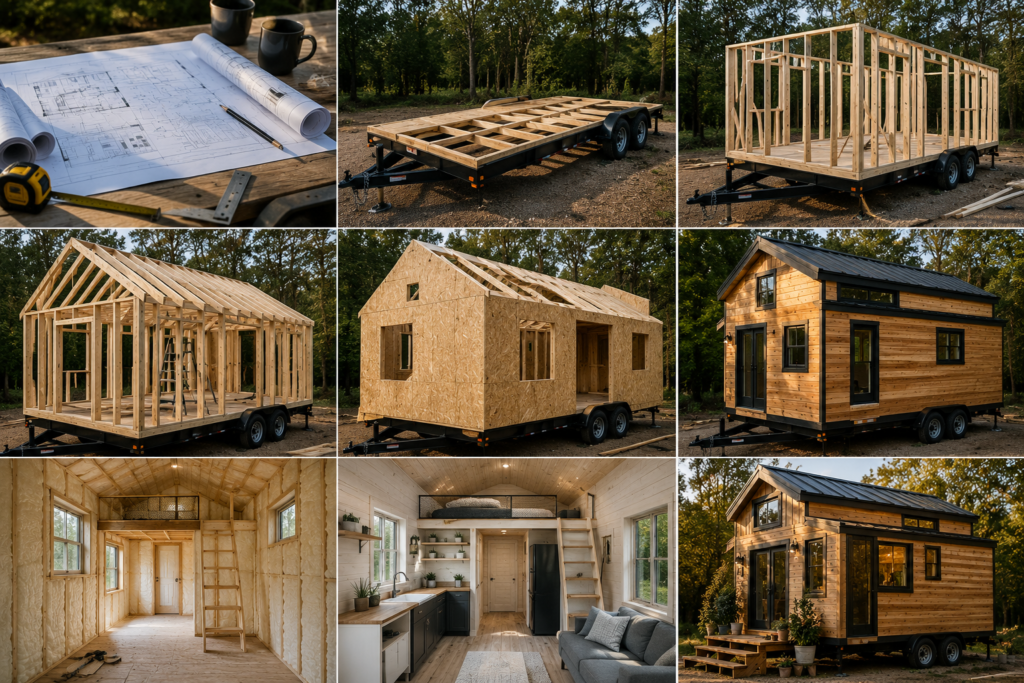
For THOWs: inspect your trailer thoroughly for rust, check the axle ratings, and ensure wheel bearings are greased. Install blocking, flashing, and the subfloor system before any walls go up. For foundation builds: pour your slab or set your piers according to local frost depth requirements. A failed foundation is the most expensive mistake in any build.
Most tiny house frames go up in a weekend with a small crew. Pre-cut your lumber or steel studs from the plan’s cut list before raising walls. Install hurricane ties and structural connectors as specified — these are non-negotiable for road-worthy THOWs. Roof framing for a shed or gable roof can typically be completed in a single day once walls are up and plumbed.
Install electrical conduit, wire runs, plumbing supply lines, drain lines, and HVAC ducting before closing up the walls. This is also when you install your radiant floor heat mats if using them. Have a licensed electrician and plumber inspect and sign off before insulating and drywalling — most jurisdictions require this even for owner-builder projects.
Apply your chosen insulation system completely before installing wall cladding. For spray foam, hire a certified contractor — improper application can cause off-gassing and reduce effectiveness. Install weather-resistant barrier (house wrap) on exterior sheathing before siding goes on.
Hang your doors and windows, install flashing and trim, and apply exterior cladding. This is one of the most visually rewarding stages. Ensure all penetrations (electrical conduit, plumbing vents, exhaust fans) are properly sealed and flashed to prevent water intrusion.
Install your flooring, wall cladding, cabinets, countertops, fixtures, and trim. This phase takes the most calendar time, even if the labor hours are manageable. Paint before installing trim for cleaner lines, and install flooring before cabinets for a cleaner look.
This is the section most DIY guides gloss over. Don’t make that mistake. Zoning issues are the number one reason tiny house projects stall or fail. Here’s how to navigate them:
Your exterior style sets the tone for your interior design, your material costs, and how your home integrates into its setting. Here are the most popular options:
Modern Minimalist:
Clean lines, flat or low-pitched roofs, large windows, and neutral palettes. Usually the most expensive to build due to precision framing requirements and premium windows. Best suited for urban lots or modern tiny home communities.
Rustic Cabin:
Board and batten siding, metal or wood shingle roofing, exposed beam interiors, and warm natural tones. Highly forgiving in construction and the easiest style for first-time builders. Works beautifully in wooded or rural settings.
Scandinavian / Nordic:
White or light-painted exteriors, steep pitched roofs (great for snow loads), minimalist interiors with natural wood accents. Excellent thermal performance when built with proper insulation. A strong choice for northern climates.
Farmhouse:
Vertical shiplap siding, metal roofing, black-framed windows, and a mix of industrial and natural materials. Very popular on social media and one of the easiest styles to source materials for at reasonable cost.
Industrial Compact:
Steel or corrugated metal exteriors, exposed interior steel framing, concrete-look flooring, and open warehouse-style layouts. Best for foundation builds as metal exteriors add significant weight to THOWs.
Visit completed tiny homes before you build:
Many tiny house communities and builders offer tours. Spending an hour in a finished 200 sq ft home will tell you more about whether it suits your lifestyle than hours of online research.
Build a mock-up of your floor plan:
Use painter’s tape on your garage or driveway floor to lay out your plan at 1:1 scale. Walk through it. Cook a meal in your imaginary kitchen. It costs nothing and saves expensive regrets.
Join a tiny house community or forum:
Groups like r/TinyHouses and the Tiny House Community Forum are invaluable for sourcing materials, troubleshooting problems, and finding local builders willing to mentor.
Don’t overbuild storage:
First-time tiny home builders almost always over-engineer storage and under-invest in comfortable living spaces. You will naturally reduce possessions once you move in — plan for less storage than you think you need.
Invest in quality windows:
Poor-quality windows are the single biggest source of heat loss in tiny homes. Budget for double-pane low-E glass at minimum. The energy savings over 10 years will more than cover the upgrade cost.
Keep your design permit-ready:
Even if you’re building in an area that currently doesn’t require permits, design to code. Regulations change, and a code-compliant build will be dramatically easier to insure, finance, or sell in the future.
For the right person, absolutely. DIY tiny house builds offer a rare combination of financial benefit, creative satisfaction, and lifestyle transformation. But they’re not for everyone.
It’s worth it if you:
The homeowners who struggle are usually those who underestimate the planning phase, skip the zoning research, or choose a design based on Instagram photos rather than practical daily use.
DIY tiny house plans are the starting point — not the finish line. The real work is in understanding your needs, researching your location’s regulations, building a realistic budget, and committing to the process with patience.
Whether you’re drawn to a rustic cabin in the mountains, a modern minimalist build on a city lot, or a road-ready THOW that lets you work remotely from wherever the mood takes you, there has never been more resources, community support, and design innovation available to the DIY builder.